
Best D3.js Chart Tools to Buy in October 2025

D3.js in Action, Third Edition


D3.js in Action: Data visualization with JavaScript
Morse Plastic Pocket Chart (3-Pack) – Machinist Reference for Decimal Equivalents, Recommended Drill Sizes for Taps, and Useful Formulas
- DURABLE PLASTIC CHARTS FOR EASY ACCESS ANYTIME, ANYWHERE.
- CONVENIENT 3-PACK FOR POCKET, TOOLBOX, AND DESK USE.
- QUICK REFERENCE ELIMINATES THE NEED FOR BULKY HANDBOOKS.
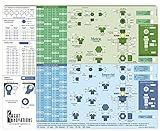
Engineering Slide Chart, Engineering Screw Chart, Screw Data Selector, Screw Selector, Screw Chart for Engineers, Drafters & Machinists
- ESSENTIAL QUICK REFERENCES FOR ENGINEERS, DESIGNERS, AND MACHINISTS.
- DURABLE, EASY-TO-READ DESIGN FOR RELIABLE ON-THE-JOB USE.
- PERFECT GIFT FOR ENGINEERING GRADS AND PROFESSIONALS ALIKE!
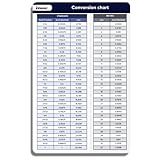
Infassic Fraction To Decimal To Millimeter (mm) Conversion Chart Magnet - Standard To Metric Magnetic Quick Reference Guide - Inches To Mm Cheat Sheet - Inch Fraction & Inch Decimal - 5.5” x 8.5”
- MAGNETIC CONVENIENCE: EASILY STICKS TO ANY METAL SURFACE FOR QUICK ACCESS.
- COMPREHENSIVE CONVERSIONS: COVERS ALL ESSENTIAL SIZE CONVERSIONS AT A GLANCE.
- PERFECT FOR PROS: IDEAL FOR ENGINEERS AND MECHANICS NEEDING FAST, RELIABLE DATA.
Mastering D3.js - Data Visualization for JavaScript Developers
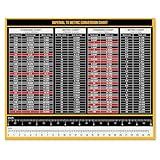
Magnetic Measurement Conversion Chart | Imperial & Metric Rulers, Measurement Tables | 10.5” x 8.5”| Made in USA
- STRONG MAGNET DESIGN: EASILY STICKS TO TOOLS & SURFACES FOR QUICK ACCESS.
- PRECISION RULERS INCLUDED: MEASURE UP TO 10 INCHES OR 30 CM EFFORTLESSLY.
- VERSATILE USAGE: PERFECT FOR DIY PROJECTS, CRAFTS, AND MORE!
To implement zoom behavior in a line chart using d3.js, follow these steps:
- Include the d3 library in your HTML file, either by downloading it or using a CDN.
- Initialize the variables needed for your line chart, such as margins, width, and height. Set up the SVG container for the chart.
- Create scales for the x-axis and y-axis. These scales will map the data values to the chart's dimensions.
- Generate the x-axis and y-axis using d3.axis functions, and append them to the chart.
- Define the line generator function using d3.line().x() and .y() methods. This function will create a path for the line based on the data points.
- Load the data for the line chart, either from a JSON file or an API endpoint.
- Bind the data to the line generator function and append it as a path element to the chart. The line will be drawn based on the provided data.
- To add zoom behavior, create a d3.zoom() object and attach it to the SVG container using the .call() method.
- Define two functions: zoomed() and resetZoom(). The zoomed() function will handle the behavior when the user zooms in or out on the chart, while the resetZoom() function will reset the zoom scale.
- Inside the zoomed() function, update the scales and axis to reflect the new zoom level. Select the line element and update its position based on the new data values.
- Add event listeners to trigger the zoom behavior. For example, you can use the mousewheel or touch events to zoom in and out.
- Finally, call the resetZoom() function to set the initial zoom level when the chart is loaded.
By following these steps, you should be able to implement zoom behavior in a line chart using d3.js. Remember to customize the chart and the zoom behavior according to your specific requirements.
How to add tooltips to data points in a line chart using d3.js?
To add tooltips to data points in a line chart using d3.js, you can follow these steps:
- Initialize your line chart and define the dimensions of the SVG container.
var margin = { top: 20, right: 20, bottom: 30, left: 50 }; var width = 600 - margin.left - margin.right; var height = 400 - margin.top - margin.bottom;
var svg = d3.select("body") .append("svg") .attr("width", width + margin.left + margin.right) .attr("height", height + margin.top + margin.bottom) .append("g") .attr("transform", "translate(" + margin.left + "," + margin.top + ")");
- Create a function to display and position the tooltips.
var tooltip = d3.select("body") .append("div") .attr("class", "tooltip") .style("opacity", 0);
function showTooltip(d) { tooltip.transition() .duration(200) .style("opacity", 0.9); tooltip.html("Value: " + d.value) .style("left", (d3.event.pageX) + "px") .style("top", (d3.event.pageY - 28) + "px"); }
function hideTooltip() { tooltip.transition() .duration(500) .style("opacity", 0); }
- Bind the data to the line chart and add tooltips to the data points.
var data = [ { date: "01-01-2021", value: 10 }, { date: "02-01-2021", value: 15 }, { date: "03-01-2021", value: 8 }, { date: "04-01-2021", value: 12 }, // Add more data points here ];
var xScale = d3.scaleTime() .domain(d3.extent(data, function(d) { return new Date(d.date); })) .range([0, width]);
var yScale = d3.scaleLinear() .domain([0, d3.max(data, function(d) { return d.value; })]) .range([height, 0]);
var line = d3.line() .x(function(d) { return xScale(new Date(d.date)); }) .y(function(d) { return yScale(d.value); });
svg.append("path") .datum(data) .attr("class", "line") .attr("d", line);
svg.selectAll(".point") .data(data) .enter().append("circle") .attr("class", "point") .attr("cx", function(d) { return xScale(new Date(d.date)); }) .attr("cy", function(d) { return yScale(d.value); }) .attr("r", 4) .on("mouseover", showTooltip) .on("mouseout", hideTooltip);
- Style the tooltips with CSS.
.tooltip { position: absolute; text-align: center; padding: 4px; font: 12px sans-serif; background: lightsteelblue; border: 0px; border-radius: 4px; pointer-events: none; z-index: 9999; }
Note: Make sure to include the D3.js library and any other necessary dependencies before running the code.
What is the purpose of a legend in a line chart?
The purpose of a legend in a line chart is to provide a visual representation of the different categories or series within the chart. It helps identify and distinguish between multiple lines or data sets. The legend typically includes labels or color codes that correspond to the lines or markers in the chart, making it easier for viewers to understand and interpret the data accurately. By using a legend, users can quickly grasp the meaning and significance of the various elements in the line chart without the need for additional explanations.
What is the difference between a line chart and a scatter plot?
A line chart and a scatter plot are both types of charts used to represent data, but they have some key differences.
- Data representation: In a line chart, data points are connected by straight lines to show the trend or change over a continuous variable, such as time. It is commonly used to display the relationship between variables that have a natural order. On the other hand, a scatter plot represents individual data points as separate dots without connecting lines, showing the relationship between two variables.
- X and Y-axis: In a line chart, the x-axis represents the independent variable, which is typically a continuous variable, such as time or distance. The y-axis represents the dependent variable, displaying the values corresponding to the independent variable. In a scatter plot, the x-axis is still used for the independent variable, but the y-axis can represent either a dependent variable or another independent variable, allowing for the examination of the relationship between two different variables.
- Purpose: A line chart primarily focuses on showing the trends or patterns within data over time or a continuous variable. It helps visualize changes, trends, or comparisons between different categories. A scatter plot, on the other hand, emphasizes the relationship between two variables, depicting the distribution, concentration, or correlation of data points.
- Data type: Line charts are suitable for quantitative data, where numbers and measurements are involved. They work well with continuous or categorical data that can be ordered. Scatter plots can also represent quantitative data but are particularly useful for examining the relationship between two numerical variables, often used to analyze correlations.
Overall, the key distinction lies in how the data is represented (connected lines in a line chart versus individual dots in a scatter plot) and the primary purpose of each chart (showing trends or patterns versus displaying relationships between variables).
How to display multiple lines on a single chart using d3.js?
To display multiple lines on a single chart using d3.js, you can follow these steps:
- Set up the SVG container and dimensions of the chart: var svg = d3.select("body") .append("svg") .attr("width", width + margin.left + margin.right) .attr("height", height + margin.top + margin.bottom) .append("g") .attr("transform", "translate(" + margin.left + "," + margin.top + ")");
- Define the scales for x and y axes: var xScale = d3.scaleLinear() .domain([0, data.length - 1]) // assuming you have an array of data points .range([0, width]); var yScale = d3.scaleLinear() .domain([0, d3.max(data, function(d) { return d.value; })]) .range([height, 0]);
- Define the line generator to create paths for the lines: var line = d3.line() .x(function(d, i) { return xScale(i); }) .y(function(d) { return yScale(d.value); });
- Append path elements to the SVG, one for each line: svg.selectAll("path") .data(data) .enter() .append("path") .attr("fill", "none") .attr("stroke", function(d, i) { return color(i); }) // optional: assign color based on line index .attr("d", function(d) { return line(d.values); });
- Optionally, you can add axes to the chart: svg.append("g") .attr("transform", "translate(0," + height + ")") .call(d3.axisBottom(xScale)); svg.append("g") .call(d3.axisLeft(yScale));
Make sure to define your data structure correctly, with an array of objects for each line, where each object includes the values for that line.
How to create a line chart using d3.js?
To create a line chart using d3.js, you will need to:
- Include the d3.js library in your HTML file. You can use a CDN such as .
- Create an SVG element in your HTML file to hold the chart. You can use the tag, and specify the width and height attributes.
- Fetch or generate the data that you want to visualize on the line chart. This data should be in an array format, where each element of the array represents a data point.
- Define the scales for the x and y axes, which will map the data values to the screen coordinates. For example, you can use the d3.scaleLinear() function to create a linear scale.
- Create a line generator function using the d3.line() function. This function will generate the path data string to create the line.
- Append a element to the SVG element and set its "d" attribute to the result of the line generator function, passing in the data array.
- Customize the appearance of the chart by setting attributes such as stroke color, stroke width, and axis labels.
- (Optional) Add axes to the chart using the d3.axis() function.
Here is a basic example that demonstrates how to create a line chart using d3.js:
<script>
  // Sample data
  const data = \[
    { x: 0, y: 5 },
    { x: 1, y: 9 },
    { x: 2, y: 7 },
    { x: 3, y: 8 },
    { x: 4, y: 5 },
    { x: 5, y: 3 },
    { x: 6, y: 5 },
    { x: 7, y: 4 },
    { x: 8, y: 2 },
    { x: 9, y: 3 }
  \];

  // Chart dimensions
  const width = 400;
  const height = 300;
  const margin = { top: 20, right: 20, bottom: 30, left: 50 };
  const innerWidth = width - margin.left - margin.right;
  const innerHeight = height - margin.top - margin.bottom;

  // Create SVG element
  const svg = d3.select("#chart")
    .attr("width", width)
    .attr("height", height);

  // Create scales
  const xScale = d3.scaleLinear().range(\[0, innerWidth\]);
  const yScale = d3.scaleLinear().range(\[innerHeight, 0\]);

  // Define line generator
  const line = d3.line()
    .x(d => xScale(d.x))
    .y(d => yScale(d.y));

  // Set domain for scales
  xScale.domain(d3.extent(data, d => d.x));
  yScale.domain(\[0, d3.max(data, d => d.y)\]);

  // Append path element
  svg.append("path")
    .datum(data)
    .attr("fill", "none")
    .attr("stroke", "steelblue")
    .attr("stroke-width", 1.5)
    .attr("d", line);

  // Append X axis
  svg.append("g")
    .attr("transform", \`translate(0, ${innerHeight})\`)
    .call(d3.axisBottom(xScale));

  // Append Y axis
  svg.append("g")
    .call(d3.axisLeft(yScale));
</script>
This example creates a line chart with sample data, sets up the scales and defines a line generator function, and appends the line path element to the SVG element. The chart also includes x and y axes. You can customize the chart further by modifying the code and adding additional features such as tooltips or transitions.
How to create an interactive line chart using d3.js?
To create an interactive line chart using d3.js, you will need to follow these steps:
- Set up the HTML structure: Start by creating an empty svg element within a container div in your HTML file. Also, include the necessary scripts for d3.js and any other dependencies.
- Define the chart dimensions: Determine the width and height of the chart, including margins, and store them as variables.
- Load the data: Fetch or import the data you want to visualize in your line chart. Ensure that the data is in the appropriate format, such as an array of objects with x and y values.
- Create scales: Define scales for mapping the data values to the chart's dimensions. For the x-axis, use a time scale if your data has time stamps, or use a linear scale for numerical values. Use a linear scale for the y-axis.
- Set up axes: Create the x-axis and y-axis based on the scales you defined. Append the axis elements to your svg element, setting appropriate positions and labels.
- Create the line generator: Define a line generator function that uses the scales to create a line path string based on the data points.
- Plot the line: Append a path element to the svg to represent the line. Bind the data to this element using the line generator function. Set the appropriate attributes, such as stroke color and line thickness.
- Add interactivity: Implement event handlers to enable interactivity, such as updating the chart on hover or click events. Use d3.js selection and data binding to dynamically update the line based on user interaction.
- Add tooltips or callouts: Enhance the interactivity by showing tooltips or callouts when the user hovers over data points or line segments. Use d3.js to position and display the tooltips based on the user's mouse movements.
- Apply transitions: Use d3.js transitions to smoothly update the line when new data is loaded or when the chart is resized. This will give a more visually appealing and interactive experience.
- Style the chart: Apply CSS styling to make the chart visually attractive. Customize the colors, fonts, grid lines, and other visual elements based on your preferences.
- Insert the data: Finally, bind the loaded data to the line chart, and render it by calling the appropriate functions.
Remember to refer to the d3.js documentation for more details on the syntax and available methods to effectively create and customize your interactive line chart.