
Best Software Tools for Delphi Graphic Work to Buy in October 2025
Mastering Delphi Programming: A Complete Reference Guide: Learn all about building fast, scalable, and high performing applications with Delphi


JRready ST5211 Pin Removal Tool KIT for Weather Pack Metri Pack Series Connector Harness terminals and Connector Crimp pin etc Electrical Connector, Tool KIT Include DRK 785084 Amp 1.5mm Removal Tool
-
EXCEPTIONAL CUSTOMER SUPPORT: REACH OUT ANYTIME FOR QUICK SOLUTIONS!
-
VERSATILE COMPATIBILITY: SUPPORTS A WIDE RANGE OF METRI-PACK TERMINALS!
-
DURABLE DESIGN: CORROSION-RESISTANT TOOLS FOR EASY HANDLING & USE!

APTIV Metri-Pack Terminal Removal Tool 150 & 280 &Gt150 & Gt280 Series
Delphi Packard Weatherpack Terminal Release Tool
- USER-FRIENDLY DESIGN FOR QUICK TERMINAL REMOVAL.
- STREAMLINES THE PROCESS, BOOSTING EFFICIENCY.
- SAVE TIME AND ENHANCE PRODUCTIVITY EFFORTLESSLY!

APTIV Metri-Pack Terminal Removal Tool Use with 150 & 280 &Gt150 & Gt280 Series
APTIV Terminal Removal Tool GT 150; GT 280; 150 Metri-Pack; 280 metri-Pack; 280, 56 Series; 280 Metri-Pack; 480 Metri-Pack; 630 Metri-Pack; 800 Metri-Pack
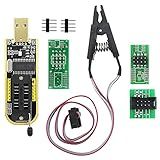
KeeYees SOP8 SOIC8 Test Clip and CH341A USB Programmer Flash for Most of 24 25 Series BIOS Chip with PDF Tutorial
- IN-CIRCUIT PROGRAMMING: FLASH BIOS WITHOUT DISASSEMBLING CHIPS!
- SUPPORTS MOST 24/25 SOP8 CHIPS-CHECK COMPATIBILITY BEFORE BUYING.
- INCLUDES DETAILED TUTORIALS AND SOFTWARE FOR EASY SETUP AND USE!
Delphi is a powerful and popular programming language that has built-in support for working with graphics and images. It provides numerous functions and components to help developers manipulate and enhance images in their applications. Here are some of the key aspects of working with graphics and images in Delphi:
- Graphics Unit: Delphi includes a Graphics unit that contains several classes and functions for working with graphics. This unit provides capabilities for drawing and manipulating 2D graphics, such as lines, shapes, and text.
- TCanvas: TCanvas is a fundamental class in Delphi's Graphics unit. It represents a drawing surface and provides methods for drawing on it. Developers can use TCanvas to draw lines, shapes, text, and even images.
- Image File Formats: Delphi supports various image file formats, including BMP, JPEG, PNG, GIF, and many others. You can load and save images in these formats using built-in functions or components.
- TImage: TImage is a Delphi component that allows displaying and manipulating images in your application's user interface. It provides properties and methods to set and retrieve the image data, resize, rotate, or apply various effects to images.
- Image Processing: Delphi provides functionality for image processing tasks such as cropping, resizing, rotating, and adjusting image colors. The Graphics unit includes functions to perform operations like scaling, stretching, and combining images.
- Graphic Controls: Delphi offers a range of graphic controls, such as TShape and TPanel, which allow developers to display basic shapes and images in a user interface. These controls provide properties to set the color, fill style, image assignment, and other visual features.
- Third-Party Libraries: Apart from built-in functionality, various third-party libraries and components are available for Delphi, specializing in advanced image processing, image recognition, and computer vision tasks. These libraries extend Delphi's capabilities and provide additional features for complex image manipulation tasks.
Working with graphics and images in Delphi requires a good understanding of the Graphics unit, TCanvas, image file formats, and image manipulation techniques. Delphi's rich set of built-in functionality, along with third-party libraries, allows developers to create visually appealing and interactive applications with ease.
What are the various image editing tools available in Delphi?
There are several image editing tools available in Delphi. Some of the popular ones include:
- GDI+: The Graphics Device Interface Plus (GDI+) library provides various image manipulation functions, such as drawing shapes, applying effects, and transforming images.
- Vcl.Imaging.jpeg: This unit allows you to work with JPEG images in Delphi. It provides functions for reading, writing, and compressing JPEG files.
- Vcl.Imaging.pngimage: This unit provides support for reading and writing PNG (Portable Network Graphics) files. It also includes functions for manipulating and editing PNG images.
- Vcl.Imaging.GifImg: This unit enables you to work with GIF (Graphics Interchange Format) images in Delphi. It provides functions for reading, writing, and animating GIF files.
- Vcl.Imaging.TiffImg: This unit allows you to read, write, and manipulate TIFF (Tagged Image File Format) images in Delphi.
- Vcl.Imaging.ExifUtils: This unit provides functions for extracting and modifying EXIF (Exchangeable Image File Format) data in JPEG images.
- Vcl.Imaging.WbmpImg: This unit offers support for reading and writing WBMP (Wireless Bitmap) files, which are typically used for mobile device images.
These are just a few examples of the image editing tools available in Delphi. There are many other third-party libraries and components that provide additional functionalities for image editing in Delphi.
How to overlay one image onto another in Delphi?
To overlay one image onto another in Delphi, you can use the TImage component along with the Canvas property to draw one image over another. Here is an example code:
- Start by placing two TImage components (Image1 and Image2) on your Delphi form.
- Load the images you want to overlay into the corresponding TImage components using the LoadFromFile method.
procedure TForm1.FormCreate(Sender: TObject); begin Image1.Picture.LoadFromFile('image1.jpg'); Image2.Picture.LoadFromFile('image2.png'); end;
- Use the OnPaint event of Image1 to draw Image2 over Image1 by accessing the Canvas property.
procedure TForm1.Image1Paint(Sender: TObject); begin // Draw the first original image (Image1) Image1.Canvas.Draw(0, 0, Image1.Picture.Graphic);
// Draw the second image (Image2) over Image1 Image1.Canvas.Draw(0, 0, Image2.Picture.Graphic); end;
- Now, when you run the application, you will see Image2 overlaid onto Image1 on the form.
Make sure that the two images have the same dimensions so that they can be overlaid correctly. Additionally, you can customize the overlaying position and apply various transformations to achieve the desired result.
How to apply image effects like sepia or blur in Delphi?
To apply image effects like sepia or blur in Delphi, you can use the Graphics32 library. Here's an example of how to apply these effects:
- Import the Graphics32 library into your Delphi project. Example: uses GR32, GR32_Image
- Load the image you want to apply the effects to into a TImage32 component. Example: Image32.Bitmap.LoadFromFile('path/to/image.jpg');
- Apply a Sepia effect to the image: procedure ApplySepiaEffect(AImage: TBitmap32); var X, Y: Integer; R, G, B: Byte; begin for Y := 0 to AImage.Height - 1 do begin for X := 0 to AImage.Width - 1 do begin R := AImage.Pixel[X, Y] and $000000FF; G := (AImage.Pixel[X, Y] and $0000FF00) shr 8; B := (AImage.Pixel[X, Y] and $00FF0000) shr 16; R := Min(R * 2, 255); G := Min(G, 127); B := Min(B div 2, 255); AImage.Pixel[X, Y] := (B shl 16) or (G shl 8) or R; end; end; end; Call this procedure with your TBitmap32 image as the parameter: ApplySepiaEffect(Image32.Bitmap);
- Apply a Blur effect to the image: procedure ApplyBlurEffect(AImage: TBitmap32; ARadius: Integer); var TempImage: TBitmap32; begin TempImage := TBitmap32.Create; try TempImage.Assign(AImage); AImage.ResetAlpha; GR32_Image.AdditiveBlend(AImage, TempImage, 0, 0); GR32_Image.FilterBlurRadial(TempImage, ARadius, AImage); finally TempImage.Free; end; end; Call this procedure with your TBitmap32 image and the desired blur radius as parameters: ApplyBlurEffect(Image32.Bitmap, 5);
- Display the modified image: procedure TForm1.FormPaint(Sender: TObject); begin Image32.PaintTo(Canvas); end; Call Invalidate to trigger the Form's Paint event: Invalidate;
Note: Make sure you have Graphics32 library properly installed and added to your project references.
How to import and display images in Delphi?
To import and display images in Delphi, you can use the TImage component. Follow the steps below:
- Open Delphi and create a new project.
- Place a TImage component on the form. You can find it in the "Standard" tab of the components palette.
- Double-click on the TImage component to open the code editor and write the following code to load an image from a file:
procedure TForm1.FormCreate(Sender: TObject); begin Image1.Picture.LoadFromFile('path_to_your_image_file'); end;
Replace 'path_to_your_image_file' with the actual path to your image file (e.g., 'C:\images\myImage.jpg').
- Run the application. The image will be displayed in the TImage component on the form.
Note: Make sure the image file exists at the specified path and is of a supported format (e.g., BMP, JPEG, PNG).
You can also load an image from a resource file. To do this, you can use the LoadFromResourceName or LoadFromResourceID method of the TPicture or TGraphic class.
For example, to load an image from a resource file using LoadFromResourceName:
- Add the image file to your project's resource file. You can do this by right-clicking on the project in the "Project Manager" and selecting "Add" > "Existing Item..."
- Double-click on the TImage component to open the code editor and write the following code to load an image from the resource file:
procedure TForm1.FormCreate(Sender: TObject); begin Image1.Picture.LoadFromResourceName(HInstance, 'IMAGE_NAME'); end;
Replace 'IMAGE_NAME' with the actual name of the image resource as defined in the resource file.
- Run the application. The image from the resource file will be displayed in the TImage component on the form.
That's it! You have imported and displayed images in Delphi using the TImage component.
How to create a transparent image with alpha channel in Delphi?
To create a transparent image with an alpha channel in Delphi, you can use the Graphics32 library. Here's an example of how to do it:
- Install the Graphics32 library in Delphi. You can download it from the official website.
- Open your Delphi project and add the Graphics32 units to your uses clause: Uses GR32, GR32_PNG, GR32_Image
- Declare a TBitmap32 object to hold your image data. This object will also handle transparency for you:
var Bitmap: TBitmap32;
- Create a new instance of the TBitmap32 class and set its properties:
Bitmap := TBitmap32.Create; Bitmap.SetSize(Width, Height); // Set the width and height of your image Bitmap.Clear(0); // Fill the image with a transparent color
- Assign transparency to certain pixel positions:
Bitmap.Pixel[x, y] := clTransparent32; // Set the pixel at position (x, y) to be transparent
- Save the image as a PNG file with the alpha channel intact:
Bitmap.SaveToFile('path\to\your\image.png');
That's it! Now, you have a transparent image with an alpha channel created using the Graphics32 library in Delphi.
How to draw lines or curves on an image in Delphi?
To draw lines or curves on an image in Delphi, you can use the Canvas property of a TImage component. Here is an example to draw a line and a curve on an image:
procedure TForm1.Button1Click(Sender: TObject); begin // Load the image Image1.Picture.LoadFromFile('image.jpg');
// Draw a line Image1.Canvas.Pen.Color := clRed; Image1.Canvas.MoveTo(10, 10); Image1.Canvas.LineTo(100, 100);
// Draw a curve Image1.Canvas.Pen.Color := clBlue; Image1.Canvas.MoveTo(200, 200); Image1.Canvas.CurveTo(200, 300, 300, 300, 300, 200); end;
This code assumes you have a TImage component named "Image1" on your form, and an image file named "image.jpg" in the same directory as your Delphi project. You can modify the coordinates and colors to suit your needs.