Best Compression Tools for Developers to Buy in November 2025
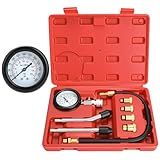
BETOOLL HW0130 8pcs Petrol Engine Cylinder Compression Tester Kit Automotive Tool Gauge
- QUICK & ACCURATE COMPRESSION CHECK FOR ALL PETROL ENGINES
- USER-FRIENDLY PRESSURE RELEASE BUTTON FOR HASSLE-FREE USE
- VERSATILE KIT WITH MULTIPLE ADAPTERS FOR VARIOUS VEHICLES


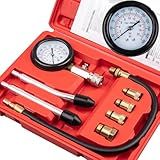
Clatoon 8pcs Petrol Engine Cylinder Compression Tester Kit, Small Engine Compression Tester Automotive Tool Gauge 0-300PSI for Testing Car Motorcycle Outboard Motor Snowmobile Chainsaw
- ACCURATE PRESSURE READINGS UP TO 300 PSI WITH EASY-TO-READ GAUGE.
- DURABLE MATERIALS PREVENT RUST AND CORROSION FOR LONG-LASTING USE.
- UNIVERSAL ADAPTERS FIT MOST VEHICLES, MAKING IT VERSATILE AND EASY.
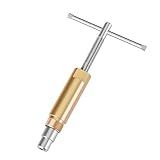
DURATECH Compression Sleeve Puller Tool, Ferrule Puller for 1/2 ” Compression Fittings, Without Damage, Corrosion Resistance, Remove Nut and Ferrule of Pipe in Kitchen, Sinks, and Bathtubs
-
EFFORTLESSLY TACKLE CORRODED PIPES WITH DURABLE A3 STEEL CONSTRUCTION.
-
REMOVE FITTINGS WITHOUT DAMAGE-PERFECT FOR TIGHT SPACES AND CONNECTIONS.
-
COMPACT, PORTABLE DESIGN IS IDEAL FOR HOME REPAIR AND EASY STORAGE.
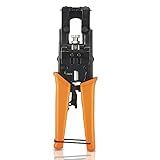
Cables Direct Online Coax Compression Connector Adjustable Tool for RG59 RG58 RG6 F BNC RCA, 2023 Model
- BUILT TO LAST WITH RUGGED DESIGN AND ANTI-RUST COATING.
- INCLUDES 3 VERSATILE COAXIAL CABLE ADAPTERS: F, BNC, RCA.
- QUICK ADJUSTMENTS WITH A UNIVERSAL DESIGN FOR EASY USABILITY.
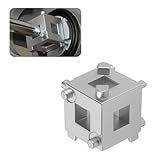
Car Cube Brake Caliper Compression Tool with 3/8" Square Drive Hole,6 Sides Brake Piston Tool for Adjusting Pistons,Steel Car Accessories Rear Brakes Caliper Tools for Disc Brakes
-
EFFORTLESSLY RESETS PISTON FOR SMOOTH CALIPER MAINTENANCE.
-
HIGH-STRENGTH STEEL ENSURES DURABILITY AND LONG-LASTING PERFORMANCE.
-
COMPATIBLE WITH VARIOUS DISC BRAKE SYSTEMS FOR VERSATILE USE.
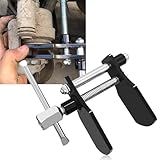
SamWinGear Brake Pad Spreader Tool Brake Caliper Hangers Caliper Compression Tool Heavy Duty Disc Brake Caliper Piston Pad Installation Spreader Tool for Car Truck SUV Motorcycle Universal Accessories
- QUICKLY ADJUST BRAKE PUMPS FOR EFFORTLESS PAD REPLACEMENTS.
- DURABLE ALLOY STEEL ENSURES LONG-LASTING, RELIABLE PERFORMANCE.
- SMOOTH OPERATION WITH EXPERTLY CRAFTED THREADS FOR EFFICIENCY.
Webpack is a powerful tool for bundling and optimizing front-end resources such as JavaScript files. One way to reduce the size of the bundled output is by using Terser, a JavaScript minifier. Terser can be integrated into the webpack configuration to only compress code without mangling or renaming variable names. This can be achieved by setting the "terserOptions" in the webpack configuration to specify the desired behavior.
By configuring Terser to only compress code, you can effectively reduce the size of the output bundle without sacrificing readability or debuggability. This can be particularly useful in cases where minimizing file size is a priority, such as when optimizing for performance or user experience.
Overall, leveraging webpack and Terser to only compress code can help improve the efficiency and performance of a front-end application by reducing the payload size while maintaining code quality.
What is webpack bundling and how does it work?
Webpack bundling is the process of combining multiple web resources such as JavaScript files, images, and CSS files into a single file (or multiple files) for optimized delivery to a web browser. This process helps to reduce the number of requests made to the server and improve loading time for web applications.
Webpack works by capturing all the dependencies of a web application and creating a dependency graph. It then processes these files using loaders and plugins to transform and optimize the code. Finally, it bundles all the files together and generates a single bundle file or multiple bundle files that can be included in the HTML document.
Webpack also allows for code splitting, which means that the application code can be split into separate bundles that can be loaded on demand. This helps to optimize the initial loading time of the application.
Overall, webpack bundling helps to simplify the development process, improve performance, and optimize the delivery of web applications to users.
How to use terser plugin in webpack?
To use the terser plugin in webpack, follow these steps:
- Install the terser plugin by running the following command in your project directory:
npm install terser-webpack-plugin --save-dev
- Import the terser plugin at the top of your webpack configuration file (usually named webpack.config.js):
const TerserPlugin = require('terser-webpack-plugin');
- Add the terser plugin to the optimization section of your webpack configuration:
module.exports = { // Other webpack configuration settings...
optimization: { minimizer: [ new TerserPlugin() ] } }
- Customize the terser plugin's options if needed by passing an object with configuration options to the plugin constructor. For example, you can specify the parallel option to enable parallel processing of files:
module.exports = { // Other webpack configuration settings...
optimization: { minimizer: [ new TerserPlugin({ parallel: true }) ] } }
- Run webpack to build your project with the terser plugin enabled:
npx webpack
The terser plugin will compress and minify your JavaScript code during the build process, resulting in smaller bundle sizes and improved performance for your web application.
How to handle CSS and images in webpack compression?
To handle CSS and images in webpack compression, you can use plugins like mini-css-extract-plugin for CSS and file-loader or url-loader for images. Here is how you can set them up in your webpack configuration file:
- For CSS compression using mini-css-extract-plugin:
const MiniCssExtractPlugin = require('mini-css-extract-plugin');
module.exports = { module: { rules: [ { test: /\.css$/, use: [MiniCssExtractPlugin.loader, 'css-loader', 'postcss-loader'] } ] }, plugins: [ new MiniCssExtractPlugin({ filename: '[name].[contentHash].css' }) ] };
- For image compression using file-loader or url-loader:
module.exports = { module: { rules: [ { test: /\.(png|jpg|gif)$/, use: [ { loader: 'file-loader', options: { name: '[name].[hash].[ext]', outputPath: 'images/' } } ] } ] }, };
Alternatively, you can use url-loader which is a higher-level loader that falls back to file-loader when files are larger than a specified limit:
module.exports = { module: { rules: [ { test: /\.(png|jpg|gif)$/, use: [ { loader: 'url-loader', options: { limit: 8192, // Convert images < 8kb to base64 strings name: '[name].[hash].[ext]', outputPath: 'images/' } } ] } ] }, };
By setting up these plugins and loaders in your webpack configuration, you can effectively compress and optimize your CSS and images for production builds.
What is the difference between production and development mode in webpack?
In Webpack, production mode is optimized for performance and deployment, while development mode is optimized for speed and debugging.
- Production Mode:
- In production mode, Webpack applies optimizations such as minification, tree shaking, code splitting, and scope hoisting to generate a smaller bundle size.
- The code generated in production mode is usually not human-readable and is meant for deployment on a live server.
- Error handling and debugging tools are minimized in production mode to improve performance.
- Production mode is typically used when building the final version of a project for production deployment.
- Development Mode:
- In development mode, Webpack generates a larger bundle size with more detailed error messages and source maps to aid in debugging.
- Development mode is optimized for speed, with features such as hot module replacement for quick updates to the application without a full reload.
- The code generated in development mode is more human-readable and easier to work with during development and testing.
- Development mode is typically used during the development phase of a project to facilitate faster development and debugging.
Overall, the main difference between production and development mode in Webpack lies in the optimization settings applied to the code and the focus on performance versus debugging and development speed.