
Best Tools for File Uploads in Spring Boot to Buy in November 2025

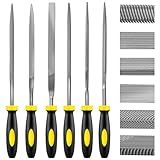
REXBETI 25Pcs Metal File Set, Premium Grade T12 Drop Forged Alloy Steel, Flat/Triangle/Half-round/Round Large File and 12pcs Needle Files with Carry Case, 6pcs Sandpaper, Brush, A Pair Working Gloves
- DURABLE T12 ALLOY STEEL FILES FOR LONG-LASTING PERFORMANCE.
- COMPLETE 25-PIECE SET INCLUDES ESSENTIAL TOOLS FOR ANY PROJECT.
- ERGONOMIC RUBBER HANDLES ENSURE COMFORT FOR EXTENDED USE.


Devvicoo 17 PCS Metal File Set Upgraded Hemicycle, Angle, Round, Flat & Needle Files for Plastic, Wood, Metal Projects - Alloy Steel Hand Tools with Storage Case
- DURABLE T12 STEEL FILES FOR UNMATCHED LONGEVITY IN ALL PROJECTS.
- VERSATILE FILE TYPES FOR PRECISION WORK ON MULTIPLE MATERIALS.
- ERGONOMIC GRIP REDUCES FATIGUE, ENHANCING COMFORT AND CONTROL.

IEGREMAR 6pcs Metal Needle File Set, Mini Hand Metal Needle File Set, 3rd Generation Hardened Alloy Strength Steel Set, Includes Flat Warding, Round, Flat, Triangular, Square and Half - Round File
-
VERSATILE 6-PIECE SET FOR PRECISE WORK ON VARIOUS MATERIALS AND PROJECTS.
-
HIGH CARBON STEEL CONSTRUCTION FOR SUPERIOR DURABILITY AND PERFORMANCE.
-
ERGONOMIC, NON-SLIP HANDLES ENSURE COMFORT AND CONTROL DURING USE.
6 Piece Metal Needle File Set - 4-inch,Carbon Steel Files for Metal, Wood & Jewelry | Includes Flat, Warding, Square, Triangular, Round, and Half-Round Files
- DURABLE CARBON STEEL: 30% LONGER LIFESPAN WITH SHARP CUTTING POWER.
- 6-IN-1 VERSATILITY: TACKLE ANY PRECISION TASK WITH VARIOUS FILE TYPES.
- ERGONOMIC GRIP: NON-SLIP HANDLES REDUCE FATIGUE FOR EFFICIENT USE.
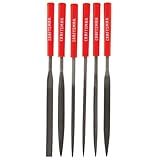
CRAFTSMAN Needle File Set, 6 Piece (CMHT82529)
- ACHIEVE PRECISION WITH FINE NEEDLE FILES FOR DETAILED PROJECTS.
- COMFORTABLE, SURE-GRIP HANDLES FOR EFFORTLESS FILING CONTROL.
- SMOOTH PATTERN DESIGN ENSURES LIGHT AND ACCURATE MATERIAL REMOVAL.

Small Hand Files Set for Detail and Precise Work, Hardened Alloy Strength Steel File Tools Includes Square,Equaling,Round,Flat Warding,Triangle
- PREMIUM T12 CARBON STEEL ENSURES DURABLE, HIGH-PERFORMANCE FILING.
- ERGONOMIC RUBBERIZED HANDLE PROVIDES COMFORT FOR EXTENDED USE.
- VERSATILE FOR SHAPING WOOD, METAL, GLASS, AND MORE WITH PRECISION.

Hi-Spec 17 Piece Metal Hand & Needle File Tool Kit Set. Large & Small Mini T12 Carbon Steel Flat, Half-Round, Round & Triangle Files. Complete in a Zipper Case with a Brush
-
VERSATILE FOR ALL MATERIALS: FILES FOR METAL, WOOD, AND PLASTICS.
-
BUILT TO LAST: HIGH-CARBON STEEL ENSURES DURABILITY AND PERFORMANCE.
-
COMPACT STORAGE: EASY TRANSPORT WITH A ZIPPERED, SPLASH-RESISTANT CASE.
To upload files in Spring Boot, you need to follow these steps:
- Create a form in your front-end application to allow users to select a file to upload. The form should have an input field of type "file" and an HTML form tag.
- In your Spring Boot application, create a controller that handles the file upload request. Annotate the controller class with @RestController or @Controller annotation.
- Define a method inside the controller that maps to the HTTP POST request for uploading files. Annotate this method with @PostMapping annotation and specify the URL path for the file upload endpoint.
- Add a parameter to the method to receive the uploaded file. Use @RequestParam("file") annotation to bind the uploaded file to the parameter.
- Inside the upload method, handle the uploaded file. You can perform various operations on the file, such as saving it to a specific directory or processing its contents.
- To store the uploaded file, you can use java.io.File or java.nio.file.Path classes to create a file or directory and save the uploaded file to it.
- Handle any exceptions or errors that may occur during the file upload process. You can use try-catch blocks or utilize Spring Boot's exception handling mechanism.
- Optionally, you can provide an appropriate response to the client indicating the success or failure of the file upload process.
Remember to include the necessary dependencies in your Spring Boot application's pom.xml file or build.gradle file for file upload support. Libraries such as Apache Commons FileUpload or Spring's MultipartResolver can be used for handling file uploads.
That's it! Following these steps will enable you to upload files in your Spring Boot application.
What is the purpose of file uploading in a Spring Boot application?
The purpose of file uploading in a Spring Boot application is to allow users to upload files from their local machine to the server. This feature is commonly used for various purposes such as uploading images, documents, or any other files that need to be stored or processed on the server-side. File uploading in a Spring Boot application enables users to submit files through a web form or an API endpoint, and the application can then process, store, or manipulate these files as required.
How to configure multipart file uploading in Spring Boot?
To configure multipart file uploading in Spring Boot, you can follow these steps:
Step 1: Add the required dependencies in your pom.xml file:
Step 2: Configure the application properties in application.properties or application.yml file to define the maximum file size:
spring.servlet.multipart.max-file-size=10MB spring.servlet.multipart.max-request-size=10MB
Step 3: Create a @Configuration class to configure the multipart resolver bean:
@Configuration public class MultipartConfig {
@Bean
public MultipartResolver multipartResolver() {
    StandardServletMultipartResolver resolver = new StandardServletMultipartResolver();
    return resolver;
}
}
Step 4: Use the @PostMapping annotation in your controller to handle the file upload request:
@PostMapping("/upload") public String uploadFile(@RequestParam("file") MultipartFile file) { // Handle the file upload logic return "File uploaded successfully!"; }
Step 5: Use the HTML form for file uploading:
That's it! You have now configured multipart file uploading in Spring Boot and can handle file upload requests using the uploadFile method in your controller.
How to implement file uploading with drag and drop functionality in Spring Boot?
To implement file uploading with drag and drop functionality in Spring Boot, follow these steps:
- Create a form in your front-end to accept file uploads. This form should have a drop area to handle file drag and drop events.
- Add an event listener to the drop area that handles the file drop event. In this event listener, retrieve the dropped files and store them in a variable.
- Create an API endpoint in your Spring Boot application to handle the file upload. This endpoint should accept a multipart file parameter.
- In the front-end event listener, create a new FormData object and append the dropped files to it.
- Send an AJAX request to the API endpoint created in step 3, passing the FormData object as the request payload.
- In the Spring Boot API endpoint, retrieve the uploaded file from the multipart file parameter and process it as needed (e.g., save it to disk, store it in a database, etc.).
Here's an example of the front-end code using JavaScript and the Dropzone library to handle the drag and drop functionality:
// HTML
// JavaScript Dropzone.autoDiscover = false; const dropzone = new Dropzone("#drop-area", { url: "/upload", autoProcessQueue: false });
dropzone.on("drop", function(event) { const files = event.dataTransfer.files; Array.from(files).forEach(file => { dropzone.addFile(file); });
// Check if all files have been added and process the queue if (dropzone.getQueuedFiles().length === files.length) { dropzone.processQueue(); } });
And here's an example of the Spring Boot implementation:
// Controller @RestController public class FileUploadController { @PostMapping("/upload") public ResponseEntity uploadFile(@RequestParam("file") MultipartFile file) { // Do something with the uploaded file // e.g., save it to disk or store it in a database
return ResponseEntity.ok("File uploaded successfully");
} }
// Application properties spring.servlet.multipart.max-file-size=10MB spring.servlet.multipart.max-request-size=10MB
Make sure to configure the maximum file size allowed for uploading in your application properties file.
This is a basic example of how to implement file uploading with drag and drop functionality in Spring Boot. You can customize it further to suit your specific requirements.
How to handle file uploads with metadata in Spring Boot?
To handle file uploads with metadata in Spring Boot, you can follow these steps:
- Add the necessary dependencies to your pom.xml file: org.springframework.bootspring-boot-starter-webcommons-fileuploadcommons-fileupload1.4org.springframework.bootspring-boot-starter-data-jpa
- Create a FileUpload class to represent the uploaded file and its metadata: import javax.persistence.Entity; import javax.persistence.GeneratedValue; import javax.persistence.GenerationType; import javax.persistence.Id; @Entity public class FileUpload { @Id @GeneratedValue(strategy = GenerationType.AUTO) private Long id; private String fileName; private String fileMetadata; // constructor, getters/setters }
- Create a FileUploadController class to handle file uploads: import org.springframework.beans.factory.annotation.Autowired; import org.springframework.web.bind.annotation.*; import org.springframework.web.multipart.MultipartFile; @RestController @RequestMapping("/file") public class FileUploadController { @Autowired private FileUploadRepository fileUploadRepository; @PostMapping("/upload") public void uploadFile(@RequestParam("file") MultipartFile file, @RequestParam("metadata") String metadata) throws IOException { FileUpload fileUpload = new FileUpload(); fileUpload.setFileName(file.getOriginalFilename()); fileUpload.setFileMetadata(metadata); fileUploadRepository.save(fileUpload); // Save the file to disk or perform any additional processing // using the file and metadata as required } }
- Create a FileUploadRepository interface to handle database operations: import org.springframework.data.repository.CrudRepository; public interface FileUploadRepository extends CrudRepository { }
- Configure the file upload properties in your application.properties file: spring.servlet.multipart.max-file-size=10MB spring.servlet.multipart.max-request-size=10MB
With these steps, you should be able to handle file uploads with metadata in your Spring Boot application.
How to handle file uploading in a controller in Spring Boot?
To handle file uploading in a controller in Spring Boot, you can follow the steps below:
- Add the necessary dependencies in your project's pom.xml or build.gradle file. For example, you can include the following dependency for Apache Commons FileUpload:
- Create a controller class with the necessary mappings. For instance:
import org.springframework.http.ResponseEntity; import org.springframework.web.bind.annotation.PostMapping; import org.springframework.web.bind.annotation.RequestParam; import org.springframework.web.bind.annotation.RestController; import org.springframework.web.multipart.MultipartFile;
@RestController public class FileUploadController {
@PostMapping("/upload")
public ResponseEntity<String> uploadFile(@RequestParam("file") MultipartFile file) {
    // Process the uploaded file here
    if (!file.isEmpty()) {
        // Save the file or perform other operations
        return ResponseEntity.ok("File uploaded successfully");
    } else {
        return ResponseEntity.badRequest().body("Invalid file");
    }
}
}
In this example, the uploadFile method is mapped to the HTTP POST request with "/upload" URL and expects a file parameter named "file" in the request.
- Configure the maximum file size allowed in your application.properties or application.yml file. For example:
spring.servlet.multipart.max-file-size=10MB spring.servlet.multipart.max-request-size=10MB
- Add the necessary configuration to your application class. For example:
import org.springframework.boot.SpringApplication; import org.springframework.boot.autoconfigure.SpringBootApplication; import org.springframework.boot.context.properties.EnableConfigurationProperties; import org.springframework.boot.web.servlet.MultipartConfigFactory; import org.springframework.context.annotation.Bean;
import javax.servlet.MultipartConfigElement;
@SpringBootApplication @EnableConfigurationProperties public class YourApplication {
public static void main(String\[\] args) {
    SpringApplication.run(YourApplication.class, args);
}

@Bean
public MultipartConfigElement multipartConfigElement() {
    MultipartConfigFactory factory = new MultipartConfigFactory();
    factory.setMaxFileSize("10MB");
    factory.setMaxRequestSize("10MB");
    return factory.createMultipartConfig();
}
}
In this example, we set the maximum allowed file size to 10MB.
That's it! Now you can send an HTTP POST request to "/upload" endpoint with a file parameter named "file" to upload a file using Spring Boot.
How to limit the number of file uploads in Spring Boot?
To limit the number of file uploads in Spring Boot, you can configure the maximum number of file uploads allowed in your application. Here are the steps:
- Include the necessary dependencies in your Spring Boot project. You will need the following dependencies in your pom.xml file: org.springframework.bootspring-boot-starter-weborg.apache.tomcat.embedtomcat-embed-coreprovided
- Configure the maximum number of file uploads allowed in your application properties (application.properties or application.yml): spring.servlet.multipart.max-file-size=10MB spring.servlet.multipart.max-request-size=10MB spring.servlet.multipart.enabled=true
- Define a configuration class to customize the Multipart configuration. Create a class, for example MultipartConfig.java, and annotate it with @Configuration: @Configuration public class MultipartConfig { @Value("${spring.servlet.multipart.max-file-size}") private String maxFileSize; @Value("${spring.servlet.multipart.max-request-size}") private String maxRequestSize; @Bean public MultipartConfigElement multipartConfigElement() { MultipartConfigFactory factory = new MultipartConfigFactory(); factory.setMaxFileSize(maxFileSize); factory.setMaxRequestSize(maxRequestSize); return factory.createMultipartConfig(); } }
- Finally, you can use the @RequestParam annotation in your controller to handle file uploads. For example: @PostMapping("/upload") public String handleFileUpload(@RequestParam("file") MultipartFile file) { // Business logic to handle the uploaded file return "Upload successful!"; }
By configuring the spring.servlet.multipart.max-file-size and spring.servlet.multipart.max-request-size properties, you can limit the size of each file upload and the total size of all file uploads combined. Adjust the values according to your needs.
How to restrict file uploads to specific file extensions in Spring Boot?
To restrict file uploads to specific file extensions in Spring Boot, you can follow these steps:
- Create a configuration class (e.g., FileUploadConfig) and annotate it with @Configuration.
- Autowire MultipartResolver and ServletRegistrationBean in the configuration class.
- Configure the allowed file extensions in the MultipartResolver bean by calling its setAllowedFileExtensions() method.
- Create a bean of ServletRegistrationBean and set the bean name and url mappings.
- Configure the MultipartResolver bean in the ServletRegistrationBean bean by calling its setMultipartResolver() method.
Here is an example implementation:
import org.springframework.beans.factory.annotation.Autowired; import org.springframework.boot.web.servlet.MultipartConfigFactory; import org.springframework.boot.web.servlet.ServletRegistrationBean; import org.springframework.context.annotation.Bean; import org.springframework.context.annotation.Configuration; import org.springframework.web.multipart.MultipartResolver; import org.springframework.web.multipart.commons.CommonsMultipartResolver;
import javax.servlet.MultipartConfigElement;
@Configuration public class FileUploadConfig {
@Autowired
private MultipartResolver multipartResolver;

@Bean
public MultipartResolver multipartResolver() {
    CommonsMultipartResolver resolver = new CommonsMultipartResolver();
    resolver.setAllowedFileExtensions(new String\[\]{"jpg", "jpeg", "png", "gif"});
    return resolver;
}

@Bean
public ServletRegistrationBean servletRegistrationBean() {
    ServletRegistrationBean registrationBean = new ServletRegistrationBean(new DispatcherServlet());
    registrationBean.setName("fileUploadServlet");
    registrationBean.setUrlMappings(Arrays.asList("/upload")); // Set your desired URL mappings

    registrationBean.setMultipartConfig(new MultipartConfigElement("/tmp", 2097152, 4194304, 0));
    return registrationBean;
}
}
In the above example, the allowed file extensions are set to jpg, jpeg, png, and gif. You can modify the array of allowed file extensions based on your requirements.
Note: This is just an example configuration. You should modify it according to your application's specific needs.
How to implement a file uploader with a browse button in Spring Boot?
To implement a file uploader with a browse button in Spring Boot, you can follow these steps:
- Add the necessary dependencies to your pom.xml file:
- Create a FileUploadController class to handle the file upload request:
import org.springframework.stereotype.Controller; import org.springframework.web.bind.annotation.PostMapping; import org.springframework.web.bind.annotation.RequestParam; import org.springframework.web.multipart.MultipartFile;
@Controller public class FileUploadController {
@PostMapping("/upload")
public String uploadFile(@RequestParam("file") MultipartFile file) {
    // Implement file upload logic here
    // You can save the file to a directory or process it further

    return "redirect:/success"; // Redirect to a success page after successful upload
}
}
- Create an HTML form for file upload in a view file (e.g., upload.html):
- Configure Spring Boot to serve static resources by adding the following line to your application.properties file:
spring.resources.static-locations=classpath:/META-INF/resources/, classpath:/resources/, classpath:/static/, classpath:/public/
- Start your Spring Boot application and access the file uploader form at http://localhost:8080/upload.
When a file is selected using the browse button and the form is submitted, the uploadFile method in the FileUploadController class will be invoked, and you can implement your desired file upload logic within that method.
How to handle file upload errors in a Spring Boot application?
In a Spring Boot application, you can handle file upload errors by implementing custom exception handling.
- Create a class to represent the custom exception, for example, FileUploadException.
public class FileUploadException extends RuntimeException { public FileUploadException(String message) { super(message); } }
- Configure an exception handler to handle the FileUploadException and return an appropriate response. You can create a global exception handler or a specific one for file upload errors.
@ControllerAdvice public class GlobalExceptionHandler {
@ExceptionHandler(FileUploadException.class)
public ResponseEntity<String> handleFileUploadException(FileUploadException ex) {
    return ResponseEntity.status(HttpStatus.BAD\_REQUEST).body(ex.getMessage());
}

// Other exception handlers
}
- In your controller, handle the file upload and throw the FileUploadException if any error occurs.
@PostMapping("/upload") public ResponseEntity handleFileUpload(@RequestParam("file") MultipartFile file) { try { // Your file upload logic here // ... if (uploadErrorCondition) { throw new FileUploadException("File upload error: "); } return ResponseEntity.ok("File uploaded successfully!"); } catch (IOException e) { throw new FileUploadException("Error occurred during file upload."); } }
Now, when a file upload error occurs, the FileUploadException will be thrown, and the exception handler defined in GlobalExceptionHandler will handle it and return an appropriate response with an error message.