
Best Graph Visualization Tools to Buy in November 2025

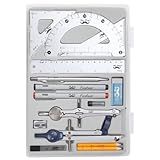
Multifunctional Geometric Ruler, 2 Pcs Drawing Template Measuring Tool, Plastic Mathematics Ruler for Student School Office and Building Supplies, Clear


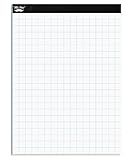
SCRIBBLEDO Dry Erase Graph Whiteboard 9" x 12" Double Sided Dry Erase Board with Grid for Home, School, Classroom, Kids and Students Portable Grid Board for Graphing and Geometry
-
ENHANCE CLARITY: PROMINENT GRAPH HELPS VISUALIZE COMPLEX MATH CONCEPTS.
-
ENCOURAGE ENGAGEMENT: AMPLE WRITING SPACE PROMOTES ACTIVE LEARNING.
-
VERSATILE TEACHING TOOL: DUAL-SIDED FOR ENDLESS MATH AND NOTE-TAKING USE.

Good Charts Workbook: Tips, Tools, and Exercises for Making Better Data Visualizations
Mr. Pen- Professional Geometry Set, 15 pcs, Geometry Kit for Artists and Students, Geometry Set, Metal Rulers and Compasses, Drawing Tools, Drafting Supplies, Drafting Set, Drafting Tools and Kits
- COMPLETE GEOMETRY SET WITH DURABLE CASE FOR EASY STORAGE & CARRY.
- IDEAL FOR STUDENTS, TEACHERS, AND PROFESSIONALS IN VARIOUS FIELDS.
- PERFECT GIFT CHOICE FOR KIDS AND FRIENDS, GREAT FOR CLASSROOM USE!
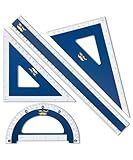
Mr. Pen- Wooden Geometry Set, 4 Pack, Triangle Ruler Set Square, Protractor Set, Protractors, Drafting Triangle, Drafting Tools & Drafting Kits, Geometry Kit, Drawing Tools
-
PREMIUM WOODEN TOOLS FOR DURABILITY AND PROFESSIONAL APPEAL.
-
VERSATILE 4-PIECE SET ENSURES PRECISION FOR ANY PROJECT.
-
CLEAR MARKINGS OFFER EASY MEASUREMENT IN INCHES AND CENTIMETERS.
Bntyok Multifunctional Geometric Ruler 4 Pieces Geometric Ruler Drawing Ruler Template Ruler Measuring Ruler Geometric Drafting Tool for Student Architecture School and Office
-
COMPLETE SET FOR ALL LEVELS: RULERS FOR ELEMENTARY TO HIGH SCHOOL!
-
VERSATILE DESIGN: DRAW VARIOUS SHAPES WITH PROFESSIONAL ACCURACY!
-
DURABLE QUALITY: LIGHTWEIGHT, STURDY RULERS FOR RELIABLE DAILY USE!
Mr. Pen- Graph Paper, 2x2 (2 Squares per inch), 8.5"x11", 55 Sheets, Grid Paper, Graphing Paper, Graph Paper Pad, Math Graph Paper, Grid Paper Pad, 1/2 Inch Graph Paper, Square Paper, Math Paper
- PREMIUM QUALITY PAPER ENSURES SMOOTH WRITING AND DRAWING.
- PERFECT FOR GRAPHS, DATA PADS, AND VERSATILE APPLICATIONS.
- STURDY DESIGN FOR LASTING USE IN VARIOUS PROJECTS.

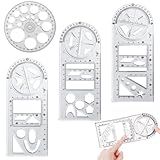
Angrox Geometric Drawings Templates Measuring Geometry Rulers 15 Pcs with 1 Pack File Bag for Design School Studying Office Building…
- COMPREHENSIVE KIT: 11 TEMPLATES, 4 MEASURING TOOLS, AND STORAGE.
- PRECISE MEASUREMENT: METRIC RULER WITH 1MM ACCURACY FOR RELIABILITY.
- VERSATILE USE: IDEAL FOR STUDENTS, ARTISTS, AND PROFESSIONALS ALIKE.
Creating force-directed graphs in D3.js involves several steps.
First, you need to set up a container element in your HTML document where the graph will be displayed. This can be an SVG element or a regular HTML element.
Next, you'll define the dimensions of the graph using width and height variables. This will determine the size of the container.
After that, you'll create a D3.js force simulation object. This will handle the physics-based simulation of the graph. You can define parameters like the strength of the forces, the velocity decay, and the distance between nodes.
You'll need to load or generate the data for your graph. This data should be in a format that D3.js can understand, such as an array of objects. Each object will represent a node or a link between nodes.
Once you have the data, you can create and append SVG elements to the container to represent the nodes and links. Each node will be represented by a circle or any other desired shape, and the links can be represented by lines.
To establish the positioning of the nodes, you will need to call the start() method of the force simulation object. This will initiate the simulation and calculate the positions of the nodes based on the defined forces.
To update the positions of the nodes on each tick of the simulation, you can use the tick() method. This method will be called continuously, and you can listen to it to update the positions of the SVG elements.
Finally, you can add interactivity to the graph using event listeners. For example, you can make the nodes draggable or attach click handlers to trigger actions when nodes are clicked.
Remember to apply appropriate CSS styles to enhance the visual appearance of the graph, such as colors, stroke widths, and font sizes.
By following these steps, you can create force-directed graphs in D3.js that effectively visualize and manipulate complex networks of nodes and links.
How to create force-directed graphs in D3.js?
To create a force-directed graph in D3.js, follow these steps:
- Include the D3 library in your HTML file. You can download the latest version from the D3.js website or include it from a CDN.
- Create a container SVG element for the graph visualization. Set its width and height according to your requirements.
- Define your graph data in the form of nodes and links. Each node should have an identifier and any additional properties you want to associate with it. Links represent connections between nodes and should specify the source and target nodes.
var nodes = [ { id: 1, name: "Node 1" }, { id: 2, name: "Node 2" }, { id: 3, name: "Node 3" } ];
var links = [ { source: 1, target: 2 }, { source: 2, target: 3 } ];
- Create a force simulation using the d3.forceSimulation() function. Configure the simulation by setting various forces that act on the nodes. In this example, we'll use a centering force and a link force.
var simulation = d3 .forceSimulation(nodes) .force("center", d3.forceCenter()) .force("link", d3.forceLink(links).id(function(d) { return d.id; })) .on("tick", ticked);
- Add SVG elements for the links and nodes using D3's data binding capabilities. Position the elements based on the current positions of the nodes.
var link = svg .selectAll(".link") .data(links) .enter() .append("line") .attr("class", "link");
var node = svg .selectAll(".node") .data(nodes) .enter() .append("circle") .attr("class", "node") .attr("r", 5);
- Create a tick function that updates the positions of the elements in each animation frame of the simulation.
function ticked() { link .attr("x1", function(d) { return d.source.x; }) .attr("y1", function(d) { return d.source.y; }) .attr("x2", function(d) { return d.target.x; }) .attr("y2", function(d) { return d.target.y; });
node .attr("cx", function(d) { return d.x; }) .attr("cy", function(d) { return d.y; }); }
- Start the simulation using the simulation.restart() function.
simulation.restart();
With these steps, you should be able to create a basic force-directed graph in D3.js. You can further customize the visual appearance, add interactivity, and configure additional forces based on your specific requirements.
What is the use of centering the graph layout in D3.js force-directed graphs?
Centering the graph layout in D3.js force-directed graphs has several uses:
- Visual appeal: Centering the graph layout helps in presenting the graph in a visually pleasing way. It ensures that the graph is not too close to the edges of the container, providing sufficient space for the nodes and links to be visible.
- Focus on the graph: By centering the graph layout, it becomes the primary focus of the visualization. This helps users in easily comprehending the relationships between nodes and the overall structure of the graph.
- User interaction: Many D3.js force-directed graph implementations enable user interaction such as zooming and panning. Centering the graph layout ensures that the initial display is centered, providing a good starting point for users to interact with the graph.
- Responsive design: When creating responsive visualizations, centering the graph layout helps in ensuring that the graph is well-positioned irrespective of the screen size or container dimensions. This allows the graph to adapt and be displayed optimally across different devices or layouts.
- Consistent positioning: If multiple graphs or visualizations are displayed together, centering the graph layout can help in maintaining consistency across the visuals. It ensures that the graphs are aligned and positioned similarly, providing a consistent experience to the users.
What is the process of coloring nodes based on attributes in D3.js force-directed graphs?
The process of coloring nodes based on attributes in D3.js force-directed graphs typically involves the following steps:
- Define the colors: Start by defining a color scale or a color mapping function that maps attribute values to specific colors. This can be done using D3.js color scales or by creating a custom function that specifies the color based on the value.
- Access the attribute values: Iterate over each node in the graph and access the attribute value that you want to use for coloring. This could be a numerical value or a categorical value.
- Assign colors to nodes: Use the defined color scale or mapping function to assign colors to the nodes based on their attribute values. This can be done by applying a class or style to each node that specifies the color.
- Update the visualization: If the force-directed graph is already rendered, you may need to update the visualization to reflect the new colors. This can be done by selecting the nodes and applying the new styles or classes.
Here is an example code snippet that demonstrates how to color nodes based on their attribute values using D3.js force-directed graphs:
// Define color scale or mapping function var colorScale = d3.scaleOrdinal() .domain(["Attribute 1", "Attribute 2", "Attribute 3"]) .range(["red", "green", "blue"]);
// Access attribute values and assign colors to nodes graph.nodes.forEach(function(node) { var attributeValue = node.attribute; // Replace 'attribute' with the actual attribute name var color = colorScale(attributeValue); node.color = color; });
// Update visualization d3.selectAll(".node") .style("fill", function(d) { return d.color; });
In this example, the colorScale is defined using a range of colors that correspond to different attribute values. The attribute values of each node are accessed and used to determine the color for that node. Finally, the visualization is updated by selecting all nodes and setting the fill color based on the assigned colors.
Note that this is a simplified example, and the specific implementation may vary depending on the structure of your graph data and the desired visualization.
What is D3.js?
D3.js (Data-Driven Documents) is a JavaScript library for creating dynamic and interactive visualizations on the web. It provides a wide range of functionality for manipulating and displaying data, including powerful features for binding data to SVG and HTML elements, creating complex layouts, and adding transitions and interactions. D3.js gives developers full control over the visual representation of their data and allows them to create custom and reusable visualizations. It is widely used for data visualization and has a large and active community.