Best Spring Boot Connector Equipment to Buy in November 2025
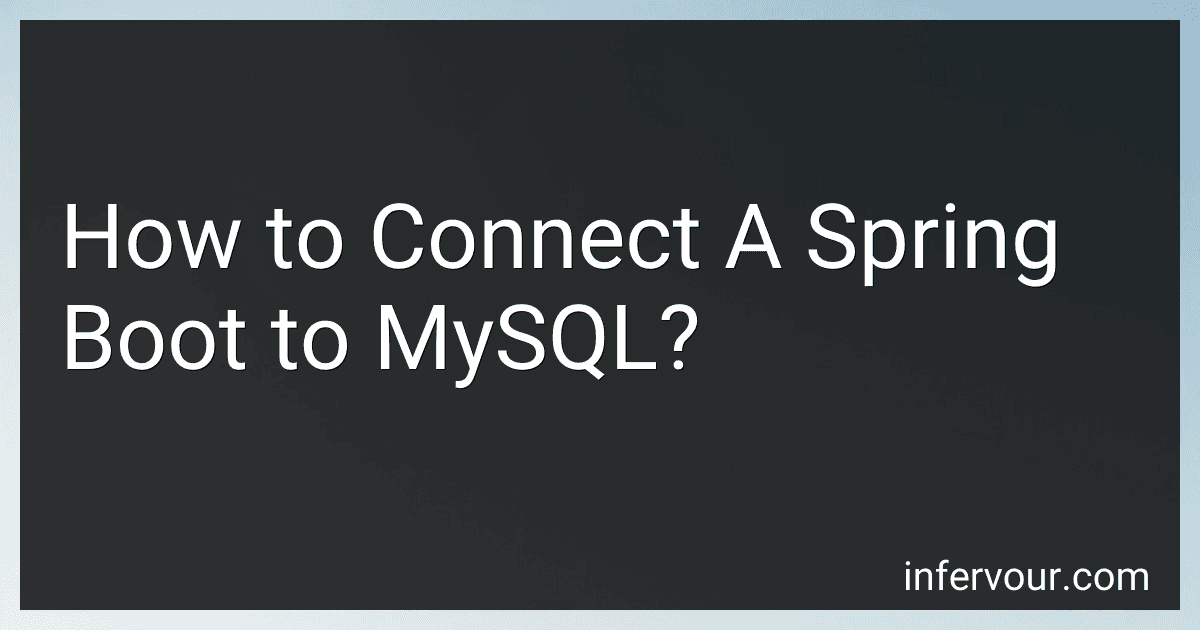
TorSor 5 Pack Spark Plug Boot Terminal Kit Rubber Cap Distributor Connector with Spring Replacement for M.C 5 Ignition Coil Wire 2 Stroke 4500 5200 5800 45CC 52CC 58CC Gas Chainsaw Garden Tool
- COMPLETE SET: 5 IGNITION COIL CAPS WITH SPRINGS FOR EASY REPLACEMENT.
- PERFECT FIT FOR POPULAR 2-STROKE CHAINSAW MODELS (45CC-58CC).
- HIGH RELIABILITY & EASY INSTALLATION ENSURE OPTIMAL PERFORMANCE.


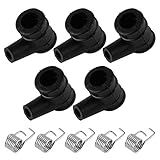
Spark Plug Boot Terminal Kit - 90 Degree HEI Distributor and Coil Boot Ignition Wire (8-Pack)
- FITS 6-10MM WIRES FOR VERSATILE APPLICATIONS.
- INCLUDES 90° BOOTS AND 8 LOCKING TERMINALS FOR SECURE CONNECTIONS.
- DURABLE, EASY-TO-INSTALL DESIGN ENSURES RELIABLE PERFORMANCE.
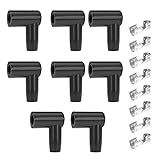
QOOSIKICC 65 Pcs Spring Wire Connectors, Spring Clamp Terminal Cable Clamp Connector, CH-2 Electrical Cable Connectors Block, 2 Pin Push-in Quick Terminal Wire Connector Wiring Terminals
- FLAME-RETARDANT MATERIALS: SAFE, LONG-LASTING, AND RESISTANT TO CORROSION.
- EASY, NO-DRILL INSTALLATION: FAST WIRING FOR VARIOUS ELECTRICAL APPLICATIONS.
- RELIABLE CONDUCTIVITY: HIGH-QUALITY DESIGN ENSURES OVER 50 YEARS OF USE.

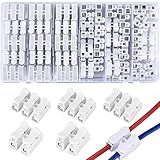
Taylor Cable 46051 Black Low Profile Distributor and Coil Boot/Terminal Kit - Set of 11
- DURABLE VIBRATION-PROOF SPRINGS ENSURE SECURE CONNECTIONS.
- VERSATILE 90-DEGREE BOOTS FIT VARIOUS INSTALLATIONS.
- COMPLETE SET OF 11 WITH HEI ENDS FOR OPTIMAL PERFORMANCE.
trueCABLE RJ45 Strain Relief Boots, Large 5.5 to 7.0mm Cut-to-Fit PVC Plug Cover, Transparent, 100 Pieces
- PROTECTS CABLES & CONNECTORS WITH INNOVATIVE SNAGLESS DESIGN!
- CUSTOMIZABLE FIT FOR VARIOUS CABLE SIZES, ENSURING SECURE CONNECTIONS.
- HASSLE-FREE INSTALLATION IN A CONVENIENT 100-PIECE RESEALABLE BAG!
FULARR 62Pcs Premium Spring Wire Connectors, Quick Spring Connector, Electrical Cable Clamp Terminal Block Connector, LED Strip Light Wire Connecting –– 50Pcs CH2 + 12Pcs CH3
- EASY INSTALLATION: QUICK PRESS-IN DESIGN FOR FAST AND EFFICIENT SETUP.
- HIGH-QUALITY SAFETY: FIREPROOF, NON-TOXIC MATERIAL ENSURES RELIABILITY.
- VERSATILE USE: IDEAL FOR LIGHTING, POWER, AND AUTOMOTIVE WIRING NEEDS.
BOSCH 1287013003 Fuel Injector Connector
- COMPLETE SET FOR EASY, HASSLE-FREE INSTALLATION INCLUDED!
- BUILT TO ENDURE HIGH ENGINE TEMPERATURES FOR LASTING PERFORMANCE.
- FITS SPECIFIC VEHICLE MODELS FOR PERFECT COMPATIBILITY.
Walker Products 900-P2085-6 Premium Coil on Plug Boot Kit
- OEM QUALITY: ENSURES RELIABLE PERFORMANCE AND DURABILITY.
- RFI SUPPRESSION: ENHANCES IGNITION EFFICIENCY AND REDUCES INTERFERENCE.
- WEATHERPROOF SEAL: PROTECTS AGAINST MOISTURE FOR OPTIMAL FUNCTIONALITY.
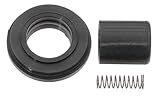
ACDelco Gold 16119 (19328116) Coil-on-Spark Plug Boot Plug Boot with Spring and Flange
- WEATHER-TIGHT SEAL PREVENTS MOISTURE FOR RELIABLE PERFORMANCE.
- HIGH-TEMP SILICONE PROTECTS AGAINST THERMAL OVERLOAD RISKS.
- STAINLESS STEEL SPRING MAXIMIZES VOLTAGE AND CUTS RFI NOISE.
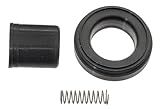
ACDelco Gold 16118 (19328115) Coil-on-Spark Plug Boot Plug Boot with Spring and Flange
- WEATHER-TIGHT BOOT SEAL PREVENTS MOISTURE INTRUSION FOR RELIABILITY.
- HIGH-TEMP SILICONE GUARDS AGAINST THERMAL OVERLOAD IN HARSH CONDITIONS.
- RFI-SUPPRESSING STAINLESS STEEL SPRING ENSURES PEAK SPARK PLUG PERFORMANCE.
To connect a Spring Boot application to a MySQL database, you need to follow these steps:
- Include MySQL Connector dependency: In your Spring Boot application's pom.xml file, add the MySQL Connector dependency to enable the application to communicate with the MySQL database. You can add the following lines within the section:
- Configure MySQL connection properties: In the application.properties file, specify the connection properties of your MySQL database such as URL, username, and password. Add the following lines:
spring.datasource.url=jdbc:mysql://localhost:3306/your_database_name spring.datasource.username=your_username spring.datasource.password=your_password spring.datasource.driver-class-name=com.mysql.jdbc.Driver
Replace your_database_name, your_username, and your_password with your actual database name, username, and password respectively.
- Create an Entity class: Create a Java class that represents a table in your MySQL database. Annotate the class with @Entity and define the table columns using @Column annotations. Additionally, mark the primary key field with @Id annotation. For example:
@Entity public class User { @Id private Long id;
@Column
private String name;

// getters and setters
}
- Create a Repository interface: Create a repository interface that extends JpaRepository provided by Spring Data JPA. This interface will provide all the CRUD operations for your entity class. For example:
@Repository public interface UserRepository extends JpaRepository<User, Long> { // additional custom methods can be defined here if needed }
- Access data using the Repository: In your service or controller classes, you can inject an instance of the repository interface and use its methods to interact with the MySQL database. For example:
@Service public class UserService { private final UserRepository userRepository;
public UserService(UserRepository userRepository) {
    this.userRepository = userRepository;
}

public List<User> getAllUsers() {
    return userRepository.findAll();
}

public User getUserById(Long id) {
    return userRepository.findById(id).orElse(null);
}

public User saveUser(User user) {
    return userRepository.save(user);
}

// other methods as required
}
That's it! With these steps, your Spring Boot application will be connected to a MySQL database and able to perform CRUD operations on the specified entity.
How to handle exceptions when connecting to MySQL in Spring Boot?
When connecting to MySQL in Spring Boot, you can handle exceptions using the following approaches:
- Try-Catch Block: Use a try-catch block to catch any exceptions that may occur during the connection process. For example:
try { // Connect to the MySQL database } catch (Exception e) { // Handle the exception }
- Custom Exception Handling: Create a custom exception handler to handle specific exceptions related to MySQL connectivity. This can be done by extending the ResponseEntityExceptionHandler class and overriding the handleExceptionInternal() method. For example:
@ControllerAdvice public class CustomExceptionHandler extends ResponseEntityExceptionHandler {
@ExceptionHandler(value = { SQLException.class }) protected ResponseEntity handleSQLException(SQLException ex, WebRequest request) { // Handle the SQLException and return an appropriate response }
@ExceptionHandler(value = { Exception.class }) protected ResponseEntity handleOtherExceptions(Exception ex, WebRequest request) { // Handle other exceptions and return an appropriate response } }
- Using Spring's @ExceptionHandler Annotation: Annotate a method with @ExceptionHandler to handle specific exceptions. For example:
@ControllerAdvice public class CustomExceptionHandler {
@ExceptionHandler(SQLException.class) public ResponseEntity handleSQLException(SQLException ex) { // Handle the SQLException and return an appropriate response }
@ExceptionHandler(Exception.class) public ResponseEntity handleOtherExceptions(Exception ex) { // Handle other exceptions and return an appropriate response } }
Remember to configure the exception handling in your Spring Boot application by either using the @ControllerAdvice annotation or registering the custom exception handler with the Spring context.
How to specify the MySQL database properties in application.properties?
To specify the MySQL database properties in application.properties, you need to include the following properties:
- JDBC URL: Specify the URL to connect to the MySQL database. Example: spring.datasource.url=jdbc:mysql://localhost:3306/mydatabase
- Username: Specify the username to connect to the MySQL database. Example: spring.datasource.username=root
- Password: Specify the password to connect to the MySQL database. Example: spring.datasource.password=mysecretpassword
- Driver class name: Specify the driver class for MySQL. Example: spring.datasource.driver-class-name=com.mysql.cj.jdbc.Driver
Here is a sample application.properties file for connecting to a MySQL database:
# MySQL Connection Properties spring.datasource.url=jdbc:mysql://localhost:3306/mydatabase spring.datasource.username=root spring.datasource.password=mysecretpassword spring.datasource.driver-class-name=com.mysql.cj.jdbc.Driver
Make sure to replace mydatabase, root, and mysecretpassword with your actual database name, username, and password. Additionally, ensure that you have the MySQL JDBC driver dependency included in your project's dependencies.
How to manage database schema updates in Spring Boot with MySQL?
There are several approaches to manage database schema updates in Spring Boot with MySQL. Here are a few commonly used methods:
- Flyway: Flyway is a database migration tool that helps manage and version control database schema changes. Spring Boot has built-in support for Flyway. You can add Flyway dependencies to your project and define your database migration scripts using SQL or Java-based migrations. Flyway will automatically execute these scripts in the correct order during the application startup.
- Liquibase: Liquibase is another popular database migration tool that provides similar functionality to Flyway. Spring Boot also has built-in support for Liquibase. You can add Liquibase dependencies to your project and define your database changes using XML, YAML, or SQL-based migration scripts. Liquibase will automatically apply these changes during the application startup.
- Manual updates: If you prefer a manual approach, you can manage database schema updates manually using SQL scripts. You can create separate SQL scripts for each schema update and execute them manually using database management tools or command-line interfaces. This method requires more manual effort and is less automated compared to using migration tools like Flyway or Liquibase. However, it gives you more control over the update process.
Regardless of the approach you choose, it's important to ensure that you have proper backup and rollback strategies in place before making any schema changes to your production database.
How does Spring Boot handle database connections?
Spring Boot uses the Spring Data JPA module to handle database connections. Spring Data JPA provides a set of abstractions and APIs that simplify database access and allow developers to interact with databases using standard Java objects.
To handle database connections, Spring Boot uses a connection pool. By default, it utilizes the HikariCP connection pool, which is a high-performance, JDBC-compliant connection pool. HikariCP balances the number of active and idle connections, allowing multiple clients to share a pool of reusable database connections.
Spring Boot also auto-configures the data source based on the application's configuration properties. The spring.datasource properties are used to configure the database connection, such as database URL, username, password, and driver class. These properties can be set in the application.properties or application.yml file or through environment variables.
Once the connection pool is configured and the data source is set up, developers can use Spring Data JPA to interact with the database. Spring Data JPA provides an abstraction layer over the underlying database technology and offers powerful features such as automatic CRUD operations, pagination, query generation based on method names, and transaction management.
Developers can use annotations like @Entity to define persistent entities, @Repository to define a repository interface, and @Transactional to mark transactional methods. Spring Boot takes care of creating the necessary database connections, managing transactions, and handling exceptions, simplifying the process of working with databases in a Spring Boot application.
How to handle caching with MySQL in Spring Boot?
To handle caching with MySQL in Spring Boot, you can follow these steps:
Step 1: Add the necessary dependencies Include the required dependencies for caching and MySQL in your Maven or Gradle build file. For example, you can add the following dependencies in your pom.xml file:
Step 2: Enable caching in Spring Boot In your Spring Boot application class, add the @EnableCaching annotation to enable caching support.
@SpringBootApplication @EnableCaching public class YourApplication { public static void main(String[] args) { SpringApplication.run(YourApplication.class, args); } }
Step 3: Configure caching in your application.properties or application.yaml file Configure the cache provider and cache properties as per your requirement. For example, you can add the following configuration in your application.properties file:
# Cache provider configuration spring.cache.type=redis
Cache configuration(s)
spring.cache.cache-names=myCache
Redis configuration
spring.redis.host=localhost spring.redis.port=6379
Note: In the above configuration, we have used Redis as the caching provider. You can use other cache providers as well (e.g., EhCache).
Step 4: Add caching annotations to your service/repository methods In your service or repository methods that you want to cache, annotate them with appropriate caching annotations, such as @Cacheable, @CachePut, or @CacheEvict. For example:
@Service public class YourService {
@Autowired
private YourRepository repository;

@Cacheable(value = "myCache") // Cache results of this method
public YourEntity getEntityById(Long id) {
    return repository.findById(id).orElse(null);
}

@CachePut(value = "myCache", key = "#entity.id") // Update cache with the result
public YourEntity saveEntity(YourEntity entity) {
    return repository.save(entity);
}

@CacheEvict(value = "myCache", key = "#id") // Evict/clear cache
public void deleteEntity(Long id) {
    repository.deleteById(id);
}
}
Step 5: Test the caching functionality Make sure to test your caching implementation to verify that the cache is working as expected. For example, call the getEntityById method multiple times with the same entity ID and observe that subsequent calls are served from the cache instead of hitting the database.
That's it! You have now successfully configured and implemented caching with MySQL in Spring Boot.